
How to Make a Chalkboard Sign
How to Make a Chalkboard sign by Brad, a.k.a Mr. 32 Turns. I am am excited to guest post for Britany today!
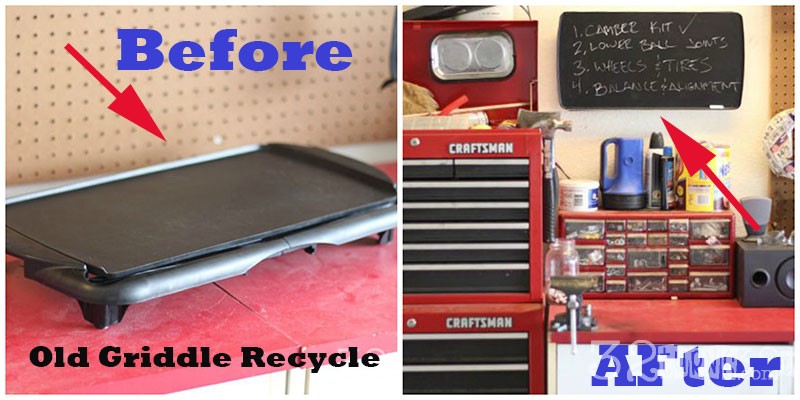
So you want to learn how to make a chalkboard sign? I came up with the idea to take a piece of trash and turn it into something useful so I got invited to the club; you can call it a “treasure” if you want to. It is kind of funny though, I feel like Britany has me brainwashed to keep my eyes peeled for projects to post about. Come on, I know you other husbands of bloggers must feel the same right?! When I presented the idea of turning an old griddle into a chalkboard sign she said I absolutely had to post about it. I am quite sure this was because she wouldn’t dare take credit for such a thing.
Me post about something?! I can hardly read let alone type. In fact it has taken me 45 minutes to get to this point (no not really). I almost regretted bringing this idea up in the first place but I said I’d do it, so here I am. Saying “yes, dear” is a big ingredient for the recipe of a happy marriage cake. After this post, I’ll be happy to sneak back into the shadows of 32 Turns by managing the technical side again; and so will you. Happy reading!
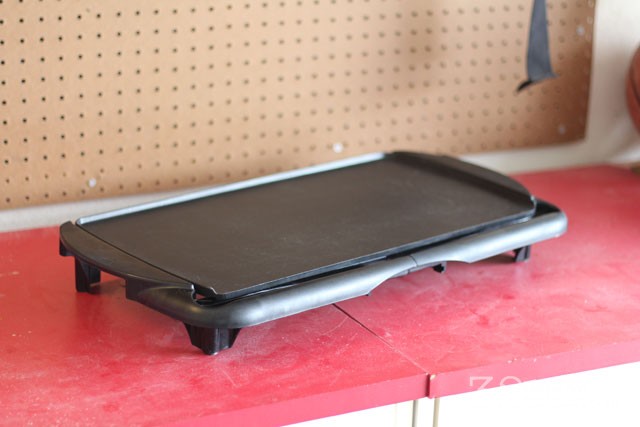
On Saturday I was working on the car, cleaning the garage, burping, and doing other manly stuff. Until I looked over and saw this old griddle sitting in the trash. The brain wash mechanics kicked right in and I thought, “Hmm, what I can I turn this into?” (thought in the voice of monotone robot 😐 ). The griddle looks to be in pretty good shape but makes yin yang pancakes. You know, the kind of pancakes where one side is completely white and uncooked and the other side is black and over cooked; cheap WalMart special. Most of the time the griddle wouldn’t even heat up unless you placed a block of cheese under the cable connector. Unfortunately, this kitchen appliance was beyond repair.
I started by taking out all of the screws to see what it looked like without the handles and frame. I have been doing this since I was a kid. I cannot count how many things I have taken apart and destroyed because I could not get it back together. Now I am pretty good at taking things apart, fixing, and putting back together. This appliance would have been perfect for any youth to take apart; very simple and it was already broken. Anyhow back to making a chalkboard sign out of an old griddle.
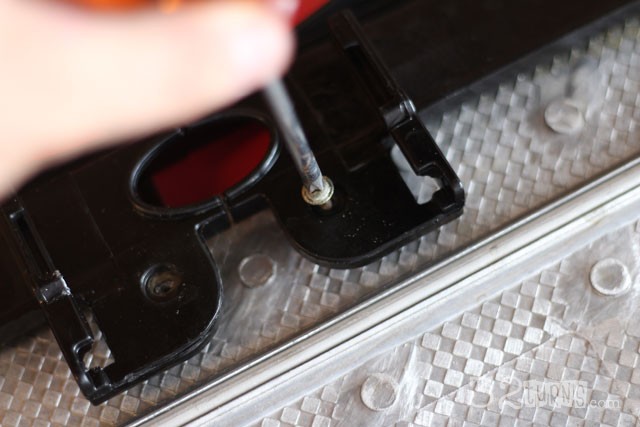
There was probably 6-10 screws total to get the griddle down to a griddle-only state. Save those screws though they will probably come in handy later. See the picture above? Those two screws were reused for the hanger. The picture below shows the what it looked like after I removed all the screws and separated the plastic frame from the metal.
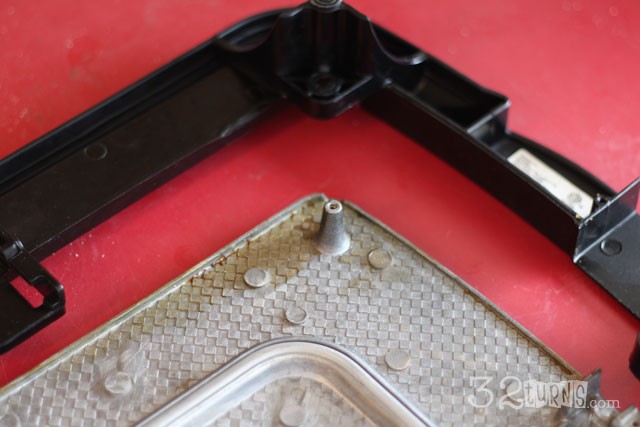
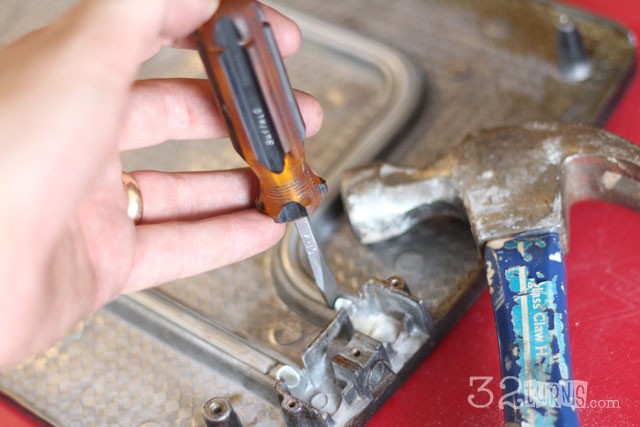
I checked out the plastic frame, tray, and handles to figure out what I could re-purpose those into but had no luck. I ended up keeping the screws and tossing the other parts back into the trash. I’m sure I could have figured something useful to use those pieces for if it wasn’t 110 degrees in my garage; that’s Arizona for you. I got the griddle down to the bare metal but it had two things sticking out of the side where the plug connected which would have made for a very odd looking chalkboard sign.
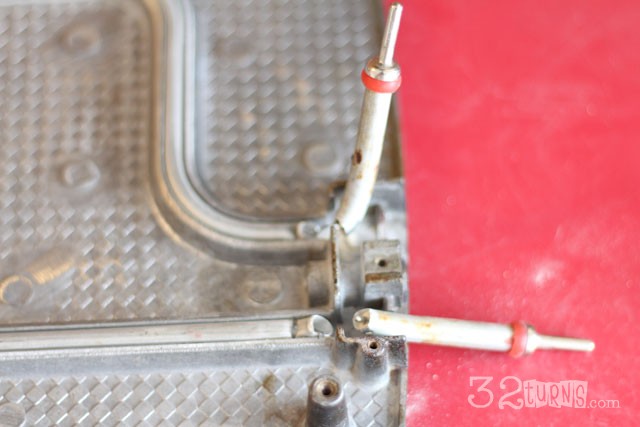
I ended up breaking those off and using a flat screw driver and a hammer to smash the open ends closed so no more mystery powder spilled out. Yes, mystery powder that’s what I’ll call it.
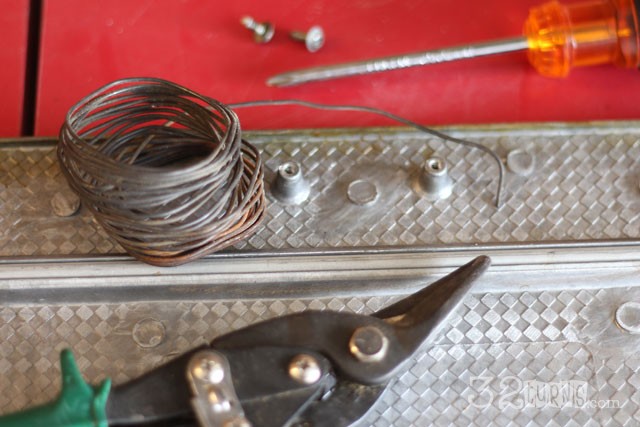
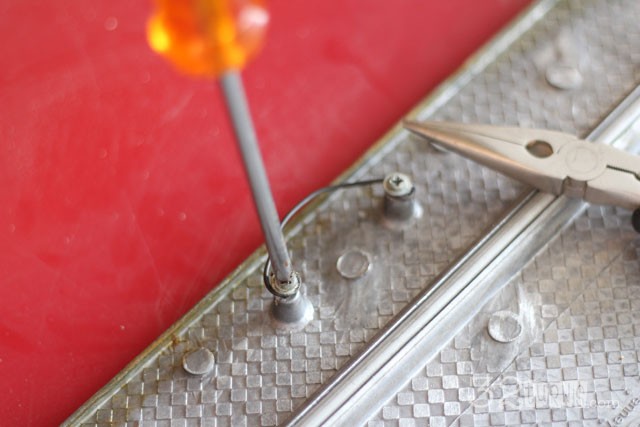
Hey, what the heck is a chalkboard sign without a way to hang it? This griddle had the two screws as mentioned and pictured above; remember? I took some snips, some manly wire I had laying around, the original screws, and my tough screw driver and created a cute, uh hem, awesome hanger. The hanger was perfectly centered per manufacturer specifications. It’s like Oster knew this griddle would last 3 months and eventually be turned into a custom hanging chalkboard sign. Thanks Oster!
The important thing here is that the wire hanger is not showing above the top of the chalkboard sign. No one want’s to see that, no one. I used some needle-nosed pliers to get the wire around the screw and trim the wire to perfect length before securely screwing it down.
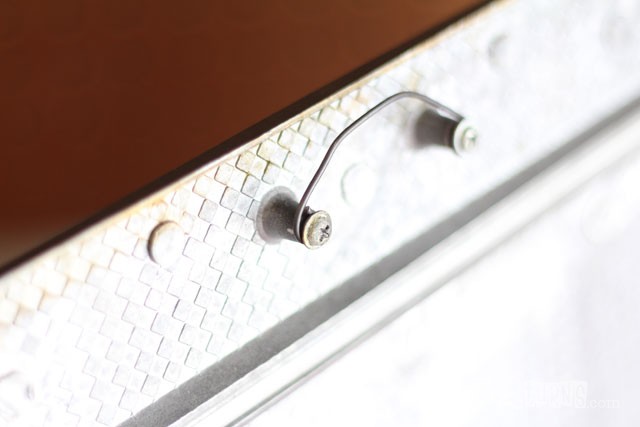
And ta-da, the final hanger! Looks pretty good right? Works perfectly and cannot be seen once the griddle is on the wall. I used some pliers to get the wire right where I wanted it so the sign would hang center. Also, the metal feet on the bottom hold the griddle out away from the wall perfectly. You can put some cork or rubber pads on the metal feet if you are worried about this gem scratching the paint off your wall.
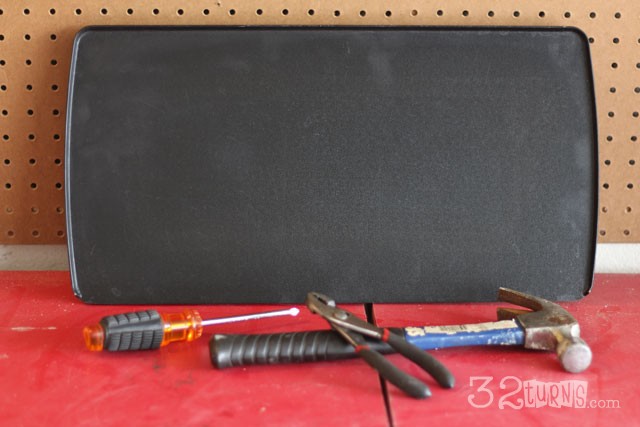
Here is the final product. You can use it in your garage, your kitchen, your kids room; your fancy dinging room, you choose. Whatever you decide is great – I prefer garage! Maybe you just want to throw it away after it is complete. This project takes about 10 minutes from start to finish so don’t feel bad if you aren’t satisfied with how it turns out. Just throw it a way and at worst you’ve lost out on 1/6th of an hour and maybe a small piece of wire. Get to it! Re-purpose those old griddles!
Perhaps instead of using it for a chalk-only board you can cut out a message made from vinyl or you can do both. Vinyl on the upper half, chalk on the lower half. This is up to you but the message “Man Cave” might not work with this project. Perhaps you can come up with something clever.
Have you re-purposed a kitchen appliance? Is so, what was it and what did you turn it into?!

You might also like...
10 Responses to How to Make a Chalkboard Sign
Leave a Reply Cancel reply


Loved reading this post from Brad:) We miss you guys tons!
Thanks Tiff, was fun writing! I might try it again sometime. Not sure I have any creativity left in me though. Miss you guys too!
@Brooke, Chocolate Milk makes every work place better! Unfortunately, in this case, the Nesquik can was re-purposed to house all my small and random spare parts.
Also, moving the computer speakers in the garage to listen to Spotify was a great move! Also helps when watching YouTube video on how to fix my car. 🙂
What I want know is, is that nesquik can full of nesquik (because I’m sure working in the garage is a perfect time for chocolate milk!) or is that repurposed as well?
This is awesome! I wish I had a broken griddle.
Haha! Glad you like it Amie! Wait three months and your new griddle will be ready for this project. This time don’t throw it out; turn it into a chalkboard sign!
This is great!!! I wish you would have done this a few months ago…before I threw away my non-Oster, but similar broken griddle! Good job guys, this was a fun and funny post:)
We have been through I think 3 or 4 skillets in our marriage. It’s about time Brad found a good use for one of them….or maybe it is just time I buy one that isn’t a piece of junk!
ha ha! Awesome!
Thanks Rachel!