
Tutorials
Bathroom Cleaning: Steps and Tips
The bathroom is easily one of grossest rooms in the house. They get so much use from every member of the household that dirt, grime, and bacteria build up quickly. Cleaning the bathroom is everyone’s least favorite chore. With these Bathroom Cleaning tips, the job won’t seem as daunting and your bathroom will be sparkling clean and germ-free.
Step 1: Start in the Shower
It is important to remember that a lot of cleaning in the bathroom requires standing time. Standing time is time that you allow cleaning solution to sit on the intended area before you start scrubbing. Cleaning solutions can do a lot of the work for you if you allow it proper standing time. Start this first step the night before your cleaning extravaganza or before you go to work. Fill a plastic bag with enough white vinegar that it will submerge the shower head completely. Put the shower head in the bag, secure it with a rubber band and let it sit. This should soak for about 8 hours to remove water build up that can cause poor pressure in your shower head. After about 8 hours take the bag off and scrub with a cleaning toothbrush, then turn the water on and let it run through to push out any debris. Next, spray the shower or tub walls with either a multipurpose cleaner or a mixture of white vinegar and water. White vinegar is excellent for removing soap scum. Soak the shower and/or tub and move on to the rest of the bathroom, giving the shower standing time.
Step 2: Toilet Time
The toilet bowl is another area that needs some standing time. Spread the toilet bowl cleaner around the inside of the bowl or use ¼ cup of chlorine bleach and let it stand while you use a multipurpose cleaner to wipe down the toilet seat, outside the bowl and the tank. You can use a cleaning toothbrush for any urine drips that have hardened outside the bowl. By the time you’re done cleaning the rest of the toilet you can begin scrubbing the inside of the bowl. Use a toilet brush to scrub out any stains or mineral deposits. Flush when you’re done scrubbing and inspect if anything is still hanging on to your toilet bowl. You can use a damp pumice stone to scrub stubborn lime scale or mineral deposits. If you have stubborn water rings you can pour white vinegar into the bowl and let it sit for an hour before scrubbing again.
Step 3: Sink Scrubbing
The bathroom sink takes a hit every day. Toothpaste, settling hair products, lime scale, falling makeup, and even leftover beard stubble that he swore he cleaned after shaving are regular residents of the bathroom sink. This is the place to take most care in disinfecting. The bathroom sink tends to carry even more bacteria than a toilet seat. You touch the faucet handles after using the bathroom before you wash your hands. Start by spraying the whole sink with bathroom cleaner containing bleach. Scrub with an abrasive cleaning tool to remove tough spots. It’s best to use disposable disinfectant wipes to wipe down all the surfaces and handles of the sink after scrubbing and rinsing. A good way to get in the nooks of the faucet is with dental floss. Floss around where the faucet meets the sink to get stowed away dirt. Finish up the sink by spraying disinfectant over the surface.
Step 4: Walls, Shower Curtains, and Hand towels
Remove any shower curtains and hand towels and put them in the wash. Most shower curtains can be machine washed. Spray all the walls with a multipurpose cleaner and wipe them. A film can build up over the walls from steam and dirt. Hang the shower curtain back up to dry and dry the towels depending on recommendations from the manufacturer.
Step 5: Back to the Shower
It’s time to wipe down those shower walls that have been soaking in cleaning fluids. Often times whatever was sprayed onto the walls has dried at this point. Either wet the walls with water from the shower head or another layer of cleaner to reactivate the dry cleaning solution. After that, scrub the walls with an abrasive cleaning tool and rinse well with water.
Step 6: Floors
Save the floors for last. You don’t want to risk slipping on a wet floor or ruin the cleanliness from cleaning other bathroom items. Wipe the floor with a multipurpose cleaner or a bleach and water combination. Use a cleaning toothbrush to get into tile grooves. In six steps you can have a clean and sterile bathroom. Use these cleaning tips to get this room as clean as possible. Make sure that you are wearing gloves at all times when handling chemicals like the ones I’ve mentioned for cleaning. Also, keep the door open and the fan on to ventilate harsh smells.
This post was offered by Nina Wells from Clearwells. Nina is an expert writer in the health and fitness niche and has been writing and studying topics like this one for over 10 years.

You might also like...
Easy DIY Kids Ornament
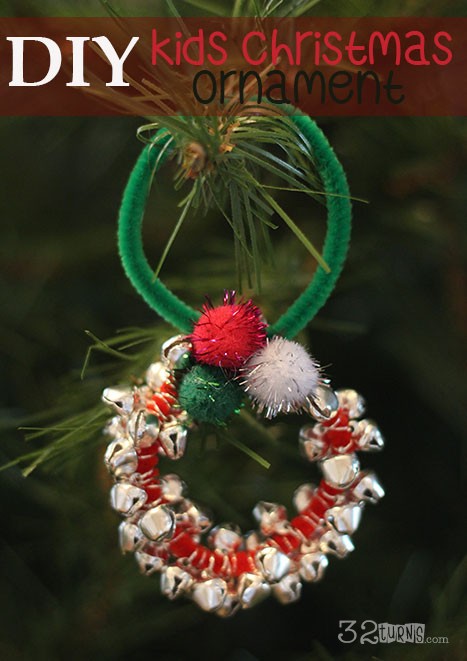
Thanks to my awesome shipment of fun craft supplies from Oriental Trading, I have been able to make so many fun Christmas themed projects. Of course my 2 girls were begging to get it in on the crafting fun. It was hard to stop what I was doing one afternoon (there is SO much to get done in December) and take some time out and just focus on my kids. But, I am SO GLAD that I did. We had a great time together inventing and creating this little ornament. Such a simple thing, but a Continue reading
You might also like...
Easy DIY Necklace Organizer
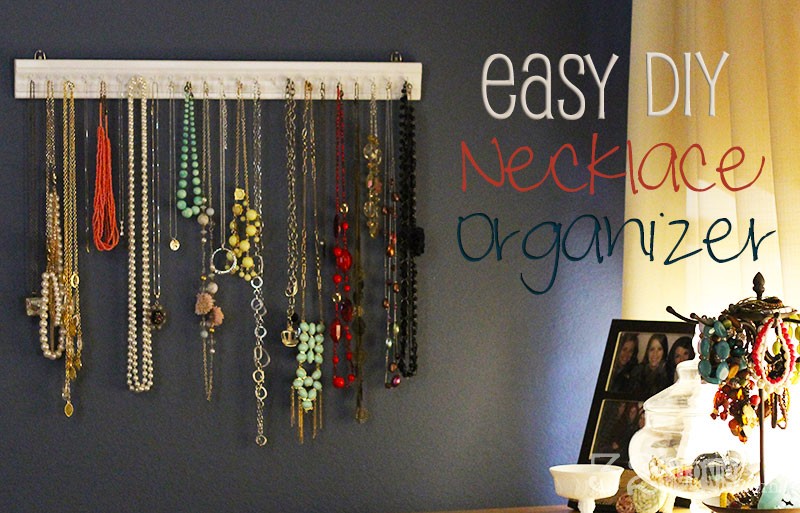
I am slowly, ever so slowly hopping on the necklace crazy train. I am what I would call an earring girl. I seriously am in love with earrings. I like having short hair so I can see them dangling below my hairline…..do you think that is weird? I love necklaces on other people and when I see them I always want to wear them but when I put on a necklace oftentimes I just don’t think it looks good. My sister Tiffany says I need to focus on Continue reading
You might also like...
Craft Room Organization
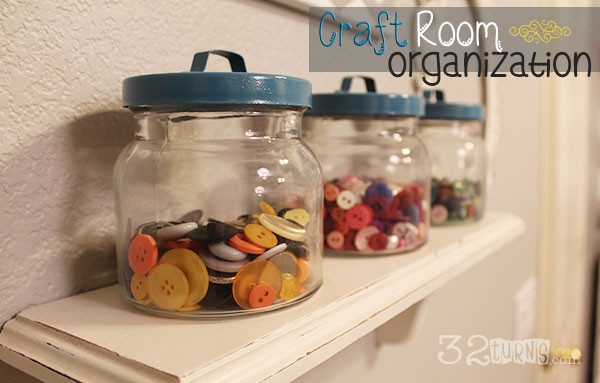
Organizing is one of my favorite things. I know….you are probably thinking I am crazy! Well, you would be right! I am a little crazy, but aren’t we all? I think that sorting and organizing, and re-arranging things so they are easier to find and more usable is super exciting. I like the process and I love the end result. I especially LOVE organizing my newly decorated craft room. I like sorting through all my fun craft trinkets. I always find things that I forgot I even had! The process of craft room organization ALWAYS inspires me to want to get my craft on and create things!!
I can talk about this topic forever, so I will spare you the forever long blog post and just highlight a few of my favorite ways to organize my craft supplies. If you have any questions about how I organized something in my craft room or how to organize something in yours, just ask!! I would be happy to share any tips or ideas I have. Not that I am an expert, but I will say it again, I LOVE TO ORGANIZE things. I should probably see someone about that!!! 🙂
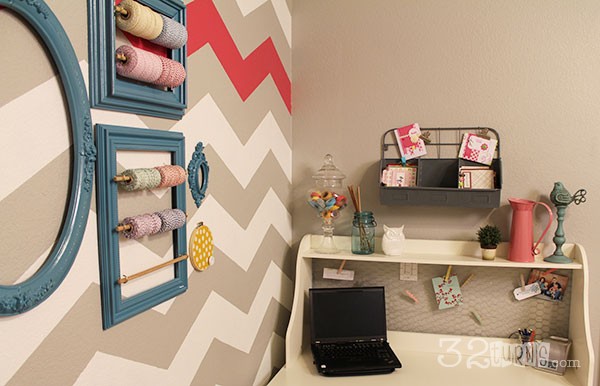
My favorite way to use things is to take advantage of the space on the walls, and shelves and not only organize things but make them look pretty. Organization and decoration at the same time, beautiful and functional! Awesome! I used some open frames to hang my bakers twine. That way it wasn’t stuffed in a drawer someplace I would forget about it, or have to dig it out when I wanted to use it. Continue reading
You might also like...
Chalkboard Banner
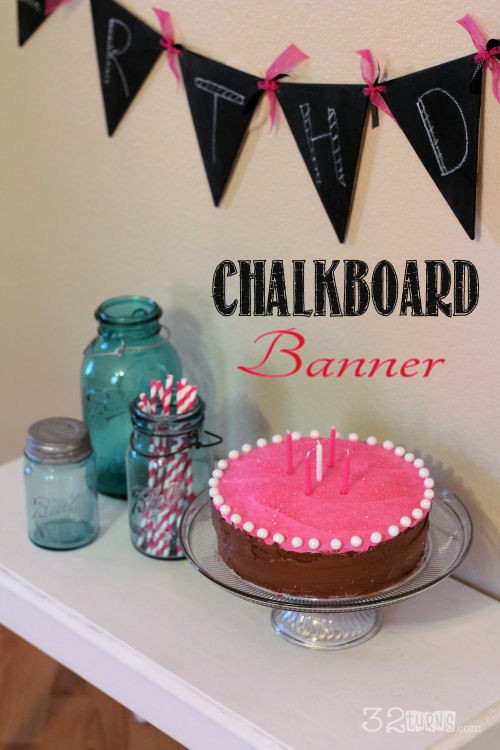
Lately I have been crushing hard on chalkboard paint! I change my mind A LOT and chalk boards are seriously perfect decorations for someone who is often changing things up!

I made this banner for my daughter’s 5th birthday a few weeks ago. Super easy. Here is the supply list: Continue reading
You might also like...