
Clean It!
Quick and resourceful ways to clean all sorts of things
Bathroom Cleaning: Steps and Tips
The bathroom is easily one of grossest rooms in the house. They get so much use from every member of the household that dirt, grime, and bacteria build up quickly. Cleaning the bathroom is everyone’s least favorite chore. With these Bathroom Cleaning tips, the job won’t seem as daunting and your bathroom will be sparkling clean and germ-free.
Step 1: Start in the Shower
It is important to remember that a lot of cleaning in the bathroom requires standing time. Standing time is time that you allow cleaning solution to sit on the intended area before you start scrubbing. Cleaning solutions can do a lot of the work for you if you allow it proper standing time. Start this first step the night before your cleaning extravaganza or before you go to work. Fill a plastic bag with enough white vinegar that it will submerge the shower head completely. Put the shower head in the bag, secure it with a rubber band and let it sit. This should soak for about 8 hours to remove water build up that can cause poor pressure in your shower head. After about 8 hours take the bag off and scrub with a cleaning toothbrush, then turn the water on and let it run through to push out any debris. Next, spray the shower or tub walls with either a multipurpose cleaner or a mixture of white vinegar and water. White vinegar is excellent for removing soap scum. Soak the shower and/or tub and move on to the rest of the bathroom, giving the shower standing time.
Step 2: Toilet Time
The toilet bowl is another area that needs some standing time. Spread the toilet bowl cleaner around the inside of the bowl or use ¼ cup of chlorine bleach and let it stand while you use a multipurpose cleaner to wipe down the toilet seat, outside the bowl and the tank. You can use a cleaning toothbrush for any urine drips that have hardened outside the bowl. By the time you’re done cleaning the rest of the toilet you can begin scrubbing the inside of the bowl. Use a toilet brush to scrub out any stains or mineral deposits. Flush when you’re done scrubbing and inspect if anything is still hanging on to your toilet bowl. You can use a damp pumice stone to scrub stubborn lime scale or mineral deposits. If you have stubborn water rings you can pour white vinegar into the bowl and let it sit for an hour before scrubbing again.
Step 3: Sink Scrubbing
The bathroom sink takes a hit every day. Toothpaste, settling hair products, lime scale, falling makeup, and even leftover beard stubble that he swore he cleaned after shaving are regular residents of the bathroom sink. This is the place to take most care in disinfecting. The bathroom sink tends to carry even more bacteria than a toilet seat. You touch the faucet handles after using the bathroom before you wash your hands. Start by spraying the whole sink with bathroom cleaner containing bleach. Scrub with an abrasive cleaning tool to remove tough spots. It’s best to use disposable disinfectant wipes to wipe down all the surfaces and handles of the sink after scrubbing and rinsing. A good way to get in the nooks of the faucet is with dental floss. Floss around where the faucet meets the sink to get stowed away dirt. Finish up the sink by spraying disinfectant over the surface.
Step 4: Walls, Shower Curtains, and Hand towels
Remove any shower curtains and hand towels and put them in the wash. Most shower curtains can be machine washed. Spray all the walls with a multipurpose cleaner and wipe them. A film can build up over the walls from steam and dirt. Hang the shower curtain back up to dry and dry the towels depending on recommendations from the manufacturer.
Step 5: Back to the Shower
It’s time to wipe down those shower walls that have been soaking in cleaning fluids. Often times whatever was sprayed onto the walls has dried at this point. Either wet the walls with water from the shower head or another layer of cleaner to reactivate the dry cleaning solution. After that, scrub the walls with an abrasive cleaning tool and rinse well with water.
Step 6: Floors
Save the floors for last. You don’t want to risk slipping on a wet floor or ruin the cleanliness from cleaning other bathroom items. Wipe the floor with a multipurpose cleaner or a bleach and water combination. Use a cleaning toothbrush to get into tile grooves. In six steps you can have a clean and sterile bathroom. Use these cleaning tips to get this room as clean as possible. Make sure that you are wearing gloves at all times when handling chemicals like the ones I’ve mentioned for cleaning. Also, keep the door open and the fan on to ventilate harsh smells.
This post was offered by Nina Wells from Clearwells. Nina is an expert writer in the health and fitness niche and has been writing and studying topics like this one for over 10 years.

You might also like...
Removing Bubblegum with Peanut Butter – Day 9
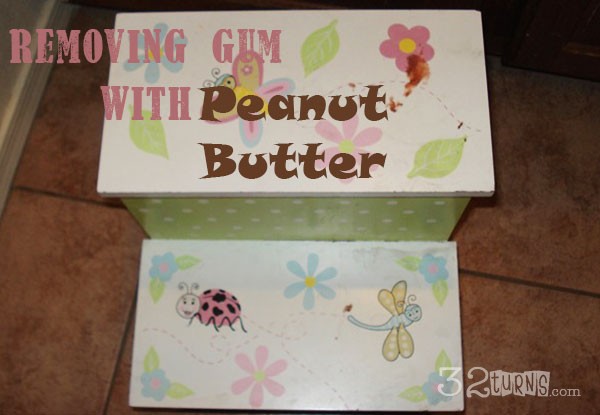
Gum, I do love to chew it, A LOT! But….unfortunately so do my girls. Usually they are really good with gum. They chew it, they spit it in the trash when they are done, well sometimes they might swallow it but of course they don’t tell me when they do that. 🙂 They do however tell me when they get that chewed up sticky gum someplace other than their mouth or the trash, Ugh!. We have had gum in their hair, they even got gum in my hair one time! We have had gum on the carpet in the house and on the floor mats in the car. It has been on our chairs and on our counter tops.
Man….when I read the last few sentences back to myself it sounds like we are a crazy gum stuck everywhere household! That isn’t true, I don’t think! But I do have a trick that will help with sticky gum situations, yay!
You might also like...
Cleaning Tips
A few weeks ago I spoke at our church’s monthly enrichment meeting. This meeting is just for the women at my church, and the monthly topics are focused on helping us to learn and grow spiritually and mentally so we can become the best wives, mothers and women we can be! I really enjoy these enrichment meetings. There is always something to learn, and I love the friendships I have built with the other women there. Those relationships alone are enough of a reason for me to attend!! But I always leave these meetings feeling uplifted and renewed and I usually come away with some type of new knowledge, and I am excited to be even better at my jobs of mom, wife and woman.
So, back to my first sentence. I was asked to give a short 15 min. presentation on cleaning and organizing. Now, if you know me you will know that I do LOVE a clean and organized house! Does that mean that my house IS always clean and organized? Heck no….I wish!!! But I am not going to say no to an assignment talking about cleaning and organizing, that stuff makes me excited like a kid at Christmas. Even if I don’t use all the tips I shared, I wish I did, my life would run way more smoothly.
You might also like...
Cleaning Games
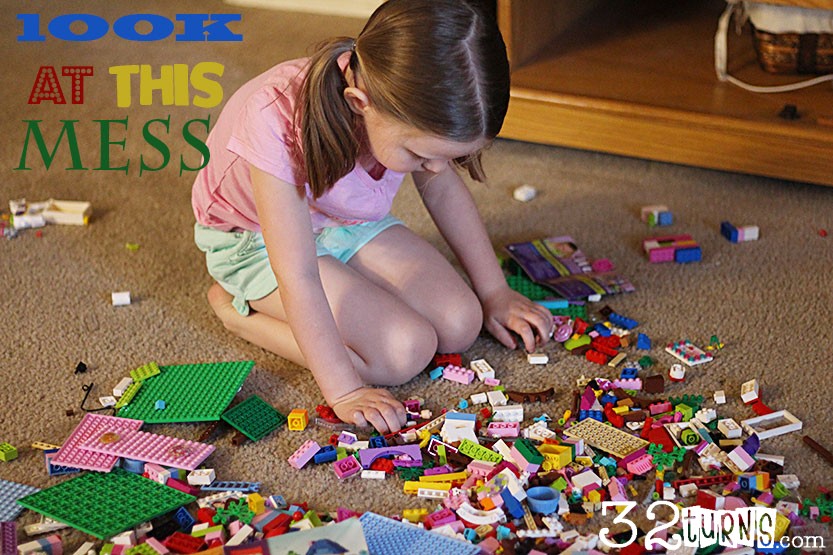
Our house gets messy, I need my kids to help out, but sometimes (okay, more like most of the time:) ) they just do not want to! Making the mess is one thing, cleaning it up is another! I cannot stand the constant fights I have trying to get them to take some responsibility for their messes. My oldest is 7 and lately her most common opinion is that I am only here in her life to boss her around! I feel strongly that my kids need to learn to work and clean and help out in our home. We are a family, and we are a team. Working together is important. Everyone in the household needs to feel a responsibility for the state of our house. But the question is, how to accomplish this? How do I get my kids to want to help out? How do I get cleaning and tidying the house to not be such a dreadful event?
You might also like...
Clean with Vinegar
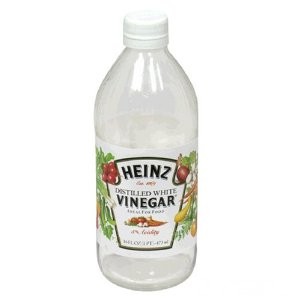 There are so many FANTASTIC ways to clean with vinegar. I love cleaning with vinegar, I do not, however, love how it smells, it kind of smells like pickles, I don’t like pickles.
But the pickle like smell dissipates fairly quickly and the bonus is, that as the vinegar smell fades so does whatever dirty, rotten smells you cleaned with it. I do like a clean smelling house, no nasty odors allowed, so the temporary pickle smell is worth it! Vinegar helps me to keep my house odor free plus it is a great stain remover, germ killer, ant repellent and more. Here is a list of 15 great ways to use vinegar in your home:
You might also like...