
Upright Piano Moving Tip
I am writing this post today from a place of TOTAL EXCITEMENT!!!! EEEEEK!!! My uber talented friend Marcy who painted my Chevron Patterned Wall in my craft room is now going to paint my piano!!! Should I use a few more exclamation marks !!!!!!!!!!!!!!! That is how stoked I am about it!!! Now just to get it moved from my house to hers!
I have wanted to paint my piano ever since I got it 8 years ago but I am by no means an excellent furniture re-doer person and since it is my PIANO we are talking about here and not just a dresser I bought on craigslist I never had the guts to do it.
Enter Marcy, unlike me is so talented at furniture re-do’s, check out her site, she is amazing. So after paint was decided and dates were chosen I just had to figure out how to get it to her.
When my parents moved here last year from Washington state we were unpacking their stuff and they had this handy dandy carry unit built around their upright piano to lift and move it more easily! Genius, I love my Dad he is super handy, so is my husband, I am one lucky girl.
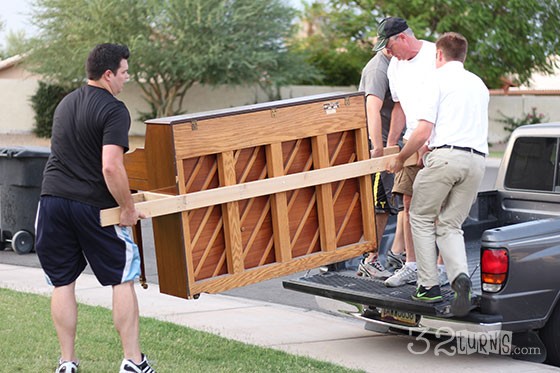
I put my husband and dad to work (they are so generous with their talents) and in no time they built me a a carrying contraption so that the muscle men could carry more piano into the bed of the truck and unload it at Marcy’s.
I am going to share with you this fantastic upright piano moving tip in case you ever have to move your piano and don’t want to try and teeter it on a dolly or pay a moving company to transport it for you.
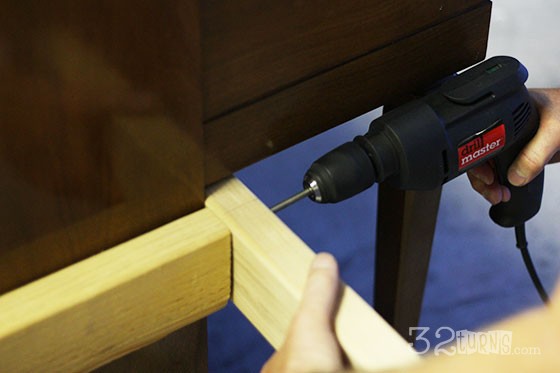
All you need are a few 2×4’s (I even had some in my garage, what DIY’er doesn’t?), a saw, a drill, and some long screws. If you don’t have a saw, no worries, just measure your piano to figure out how long you need your boards and Home Depot or Lowes will cut the wood for you. I used a little over 2 boards, what you use will depend on the size of your piano.
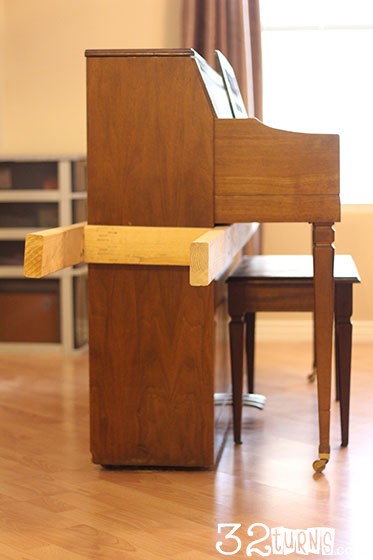
Measure the short side ends of your piano, cut 2×4’s to that size exactly. Measure the front of your piano under the keyboard. Take the length of the front, add 2 feet (for the carrying handles) and cut 2 boards to this length. One for the front and one for the back.
Take one long board and screw it directly into the back of your piano into the support beams. It will make a hole, but no one sees the back of your piano anyway, don’t worry these holes are only in the support beams, not the sound board so it will not affect the performance or the sound of your piano. It is important to make sure that the top of this back board is in line with the underside of the keyboard so that when you attach the board to the front they will be even and one will not be higher than the other.
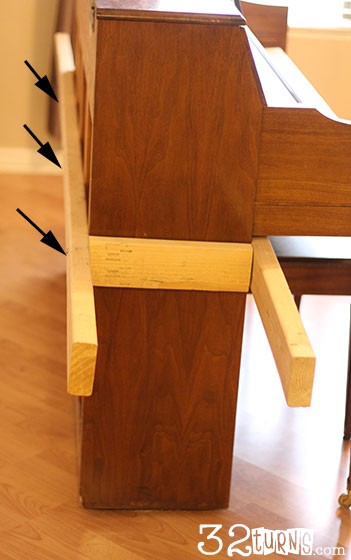
Then take your short board, lay flush against the side of the piano and screw through the back board into the side board. Repeat on other side. My arrows above show where mine is screwed directly into the back.Now lay the last long board against the front of the piano directly underneath the keyboard, screw through the front board into the side board on both sides.
Make sure as you are building your carrying contraption (not sure what else to call it) that you keep all the boards snug and tight against the piano.
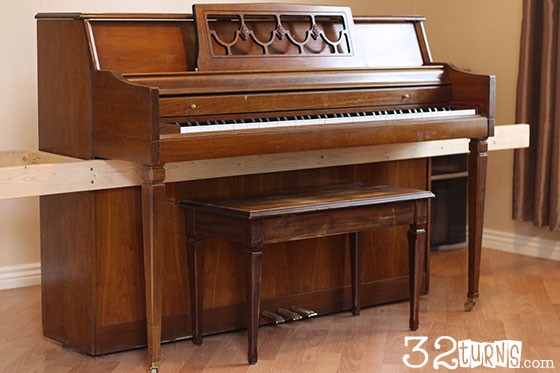
Now just get some manly muscle and have them each grab an end and LIFT!
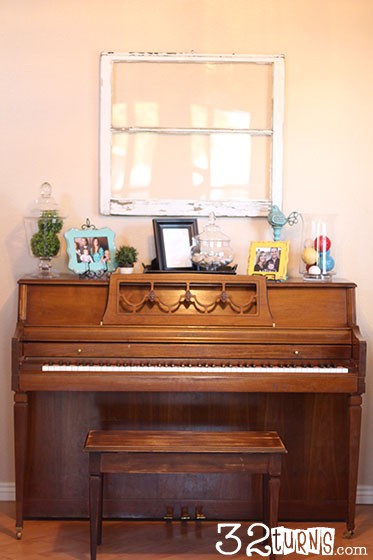
Here my piano is all tucked into Marcy’s garage, ready for her facelift!

I can’t wait to share with you the results of the makeover, it’s gonna be fantastic, Yippee!!! Here is the before shot just to get you excited too!

You might also like...
25 Responses to Upright Piano Moving Tip
Leave a Reply


Just tried this on a Stark Spinet, worked great, thanks for posting this idea!
That’s a spinet piano. The lightest weight piano. Movers use a piano board like the on in this video. https://www.youtube.com/watch?v=Lz9vpRg2OQo
It looks like a dangerous contraption that would scratch the sides and front of the piano as well putting the holes in the back. and the only thing holding it on is the screws put in the front of the piano. if someone uses drywall screws it would probably break. The arms also make it too long to maneuver in most spaces.As mentioned previously pianos a handle on the back at the same level as just under the keys. So there is no need for this on a light piano. A piano board is often not necessary especially if you are going into a garage.
As asked previously, to go upstairs, you need muscle and skill.
So you need a pro mover that has experience moving pianos.
There is usually a handle on the back and you place your hand under the keybed to lift it onto a dolly. This is a bit silly. You could use a strap or a board under the keybed but it seems superfluous to simply lifting a spinnet piano. This is not advisable on upright pianos. Piano movers are usually trying to make your life easier, while careing for you property and safety. It usually cost less for a professional mover than it does to rent a truck. Please be careful.
We did this today and this worked like a charm!!!
Thank you so much for this idea. We moved our piano this way and it worked great. Our friends thought we were so clever 🙂
Why go through all this and put holes in the piano even if it is just the braces? With a good dolly and a strap two people can easily move a piano that size with much less effort… There’s probably a good reason why the professionals don’t do it like this and just use a dolly and I’m sure that reason is that it’s way easier…
hahaha! So funny! Hubby and I move little spinets like this one, and big grands ALONE together all the time. We are OLD! Funny how 4 big strong men need this distructive method
Do you have constructive advice on moving an upright piano up stairs?
how do you guys do it? i need to move an upright that i got for free . down stairs, into the truck, and upstairs at my house. any tips or tricks or advice you can give us? 🙂
Would you tell me exactly how the two of you moved a grand piano from one house to another. We will be moving 100 miles from our present location and we thought we’d have to pay a piano mover which will be costly!
Would you tell me exactly how the two of you moved a grand piano from one house to another. We will be moving 100 miles from our present location and we thought we’d have to pay a piano mover which will be costly!
You and hubby absolutely do not move grand pianos on your own.
Great idea. I move pianos frequently. This would give much better leverage moving it!
Definitely going to have to do this when I finally find a piano to buy!
yeah SOOOOO excited to see the newly painted piano! You had better post pictures!
I definitely do have pics and will get them up soon, I promise!
Yeah this made it much easier to move!
Love it!
This is awesome! And I can’t wait to see the final product!